07 Feb Natural Light Product Photography Ideas
Photography isn’t the easiest skill to learn, and product photography is considered a particularly difficult kind of image-making. Even seasoned professional photographers in other fields get pretty stumped when it comes to shooting product images because it can be a highly technical genre. Ideally, every person selling products would have the budget to pay a specialist product photographer. But the reality is that those running small businesses often don’t have that kind of luxury. Natural light product photography is a great way to keep your costs low while adding value to your brand.
Lots of photographers will tell you that you need loads of expensive lights, a huge space, and lots of technical know-how in order to shoot a great product photo.
I used to work in a large product photography studio in London shooting stuff on white backgrounds for major high street retailers. That kind of “white background” product photography does take a large amount of skill, setup knowledge and cost. It’s even harder if you’re looking for your colours in your photograph to match the colours of your product.
However there’s been a shift over the last few years by many brands away from the highly commercial and “perfect” style of product photography and towards something that feels much more natural and organic. There’s been a whole movement towards “slow living” and a more bohemian feel to the way we present both ourselves and our products in many cases. This can only help a small business owner shooting their own products.
I’m not going to say it’s easier to shoot products in natural light, but it’s certainly simpler to learn. There’s less gear to get to grips with and you can focus on getting to know your camera which will, in turn, enable you to shoot better images of your products in the long run.
Using Window Light
You can shoot natural light product photography with just about any camera. The more sophisticated the camera, generally, the better results you’ll get, but you can ultimately shoot natural light product photos with a phone camera if you need to. So let’s take a look at my typical natural light product photography lighting setup. It’s super easy to be honest, just an old camping table next to a window is how I shoot mine! You don’t need an expensive product photography table for this kind of natural light photography. A product photography setup can be very cheap and very simple!
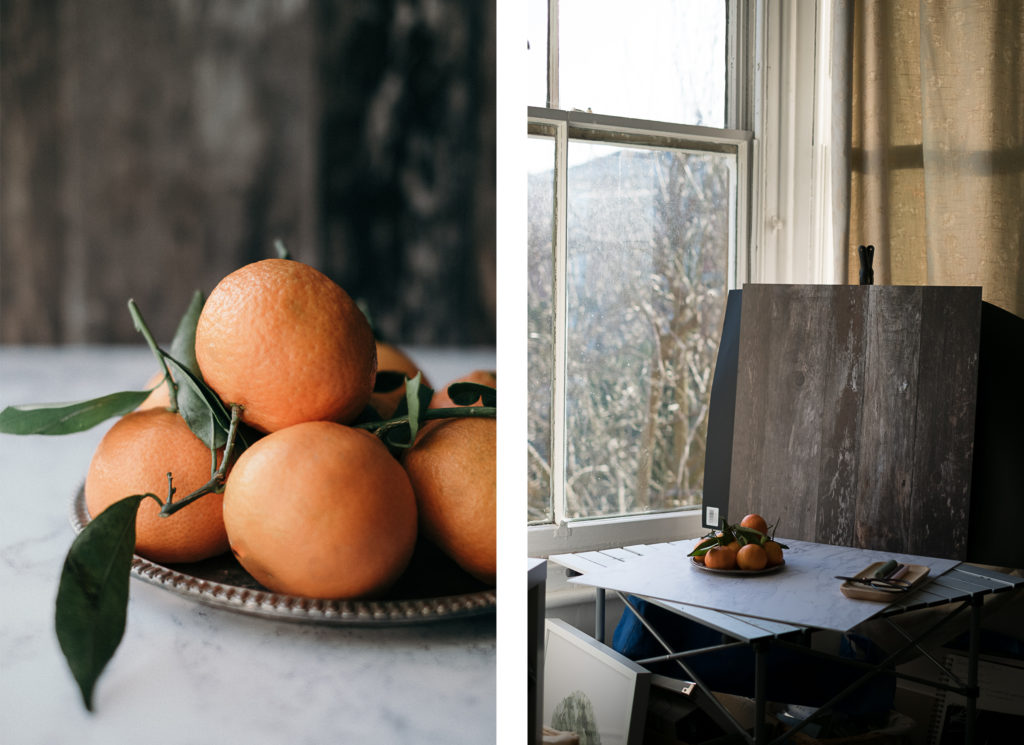
I’m really lucky to live in an old Victorian house with beautiful big windows, but you could set this up next to any medium or large size window. You could also set it up in, for instance, a garage and open the door (just make sure you’re in the shade if it’s sunny) or next to any open door in your house. Obviously a nice window is preferable because it’s not cold in the winter, but sometimes you just have to make things work!
Avoid shooting in the middle of the day, it too often gives a harsh light that isn’t great for product photography. If you have no choice but to shoot at this time, you could think about constructing a light box so that you can still use the ambient lighting without the harsh shadows.
I almost always set my product photos up so that the brightest light source is on the left hand side. Our eyes naturally “read” images from the brightest points to the darkest points. To have the light going from the brightest on the left to the darkest on the right is the same as reading a book in English – we read from left to right. This makes the image comforting, familiar, and easier for our brains to decipher.
Make sure you put your camera on a tripod, that way you can use ISO 100 (or the lowest ISO that your camera can natively shoot) and you’ll get beautiful, clear product photographs.
If you struggle with shooting times (for instance, you work during the day and can only easily shoot in the evening) then you could get light that looks natural using a studio light with a large softbox or an led light in your photo studio. But this is a much, much more tricky option. It’s very hard to make these kinds of lights look convincingly natural. Especially when it comes to food photography with all its tricky little reflections.
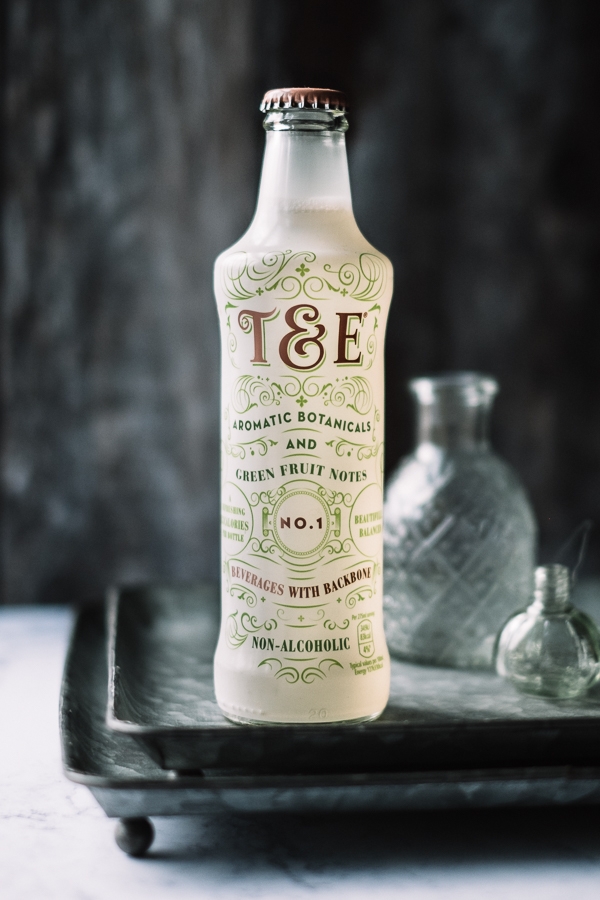
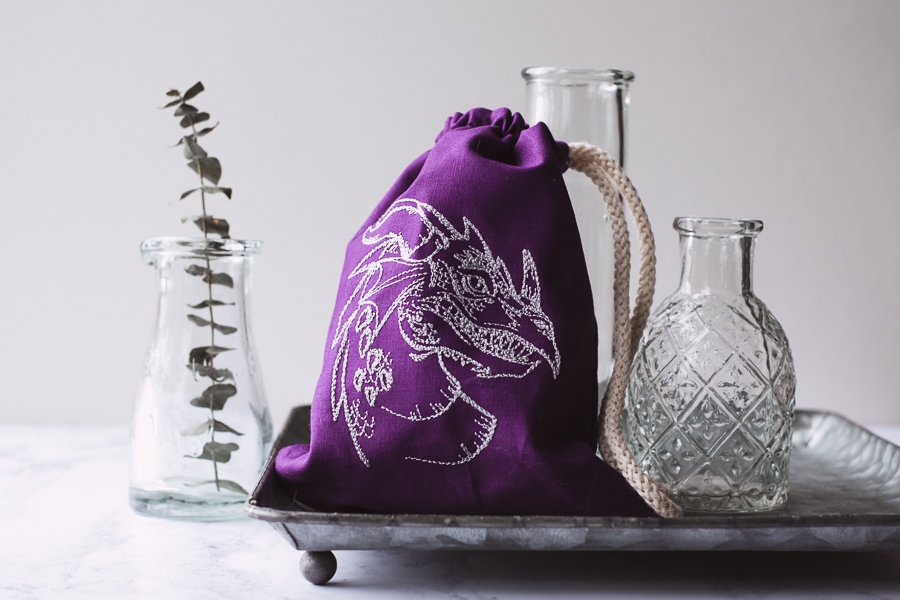
Faking Beautiful Backdrops
You’ll notice something clever in the pictures above – I’ve not actually shot them on a marble counter top. Even though it looks like I have. And the backing board isn’t actually a beautiful wood-panelled room in my house either.
About a year ago I discovered the amazing PhotoBoards. Basically they are high quality photographic reproductions of interesting surfaces and backdrops printed onto sturdy and lightweight boards. Yes, you could buy a slab of marble or source some amazing wooden planks and fix them together – but honestly I’d rather just have the boards and store them neatly in a little portfolio case all together.
I cannot begin to even tell you how much these boards have revolutionised my product photography. I don’t have a beautiful aged wooden farmhouse table in a huge dining room with great lighting, and I also don’t have a wonderful marble countertop in a light and airy kitchen. But thanks to these backgrounds I can have any number of different settings stored in a portfolio bag in my studio.
Here’s a couple of images with this lighting, styled to look completely different from each other:
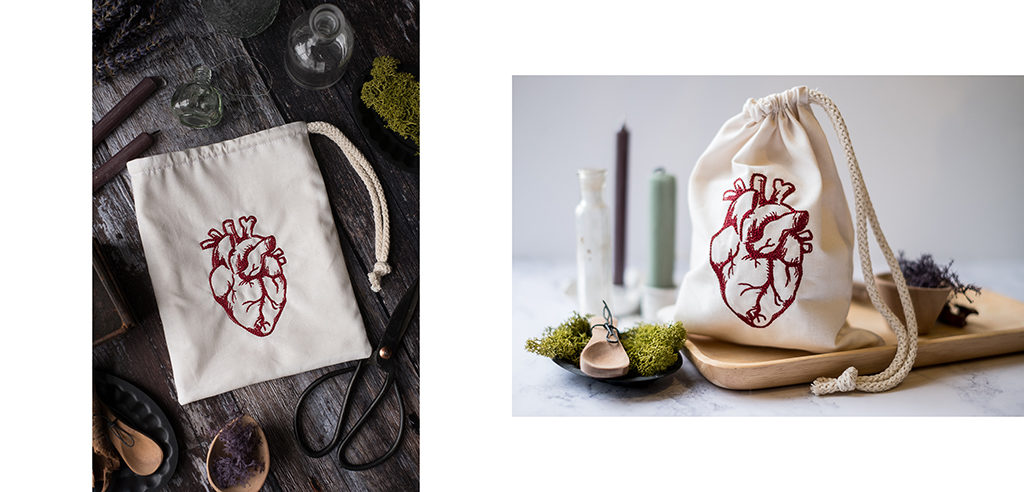
The lighter image above on the right is more in keeping with Etsy’s preferred style of photos. If you want to be featured in their gift guides, for example, I’d suggest sticking to light coloured backgrounds and sympathetic props. However I know that my target market are more likely to click the darker flatlay on the right on social media. It’s worth thinking about these differences. You may want to shoot your products in more than one style for different purposes.
Photographing Flatlays
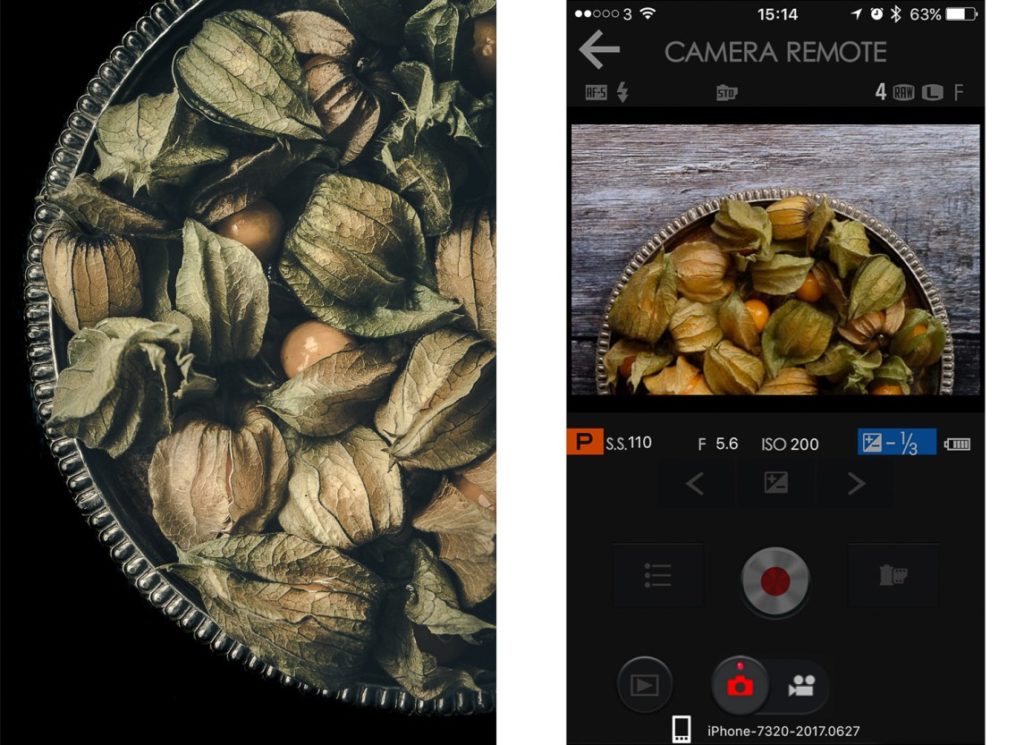
You can see the way I shoot products flatlay style in this article I wrote for Digital Photography School. It is an article on fine art photography but the principles are the same for product photography. I get my camera high above the product on a tripod and use a little spirit level to make sure the lens is perpendicular to the backing board. There’s a little bonus in owning a Fujifilm camera like mine – many of them work with the Fuji iPhone app. This means that I can put my phone down on the table where I’m styling and it doesn’t matter that the camera is above my head height because I can see exactly what the camera sees on my phone screen. Here’s a screenshot of the app, next to the final picture I produced:
I can’t recommend the little Fujifilm X-T20 highly enough. As I write this it’s currently about £900 including a starter lens on both WEX Photographic and Amazon. I bought mine about eighteen months ago and it revolutionised my photography – although that’s a discussion for a different post.
A new camera is a serious monetary investment in your business. I only mention it to let you know what I use if you wanted to upgrade to a system that allows you to use the app like I do. You probably already have a camera that will take more than adequate product photos. If you want to learn more about your camera I recommend joining a Facebook group for your make and model.
Lightboxes and Light Tents
I have used light tents in the past. Specifically I used to use them for photographing pens when I worked in the big product photography studio in London. Pens are often shiny little things and reflect everything around them, so the white surfaces from the inside of a light tent make for more pleasing reflections.
I generally don’t recommend these kinds of photography accessories unless you have particularly challenging products with reflections or you can only shoot in the evenings. It’s hard to manipulate the light to get shadows that show off the product. Everything tends to end up looking quite flat if you use a light tent.
At some point in the future I plan to try and write a post on using them well to create interesting product images.
Styling Your Images
Needless to say – styling is really important when it comes to these kinds of lifestyle product images. My plan is to write a whole series of posts (perhaps even an eBook) on the subject. But for now I’ve started writing on my photography site about styling. You can see them here:
Souring Props for Natural Product Photography
I hope that this has given you some useful information about how to go about shooting products for your Etsy shop in natural light. It’s not the easiest subject but with some practice then everyone should be able to create great images that really show off their products. These are some tabletop ideas to start you off, but the best way to shoot product photography that works for your brand is to keep experimenting until you find a style that works! Over time you’ll find the best product photography lighting techniques for your brand.