Neck facings are hard to… wait for it… get your head around! Ok. No more jokes.
When I saw a friend struggle with raw edges around the neck of a tunic I thought it would be worth putting together a set of photos to show how to make a neck facing. I needed to make a new set of Odyssey robes anyway (the black ones are horrible) so here it is, how to add a neck facing.
Neck facings are used, quite simply, to make a neat edge to the neck without binding it with bias binding or turning it by hand. They also stabilise an area that gets pulled about quite a bit during normal wear – even more wear if you’re LARP fighting wearing garments.
The key is, first, to pattern out your facing. You either need to draw it off the neck line of your pattern, but only extending a couple of inches from the edge (like a mini lining) or you need to invent your own.
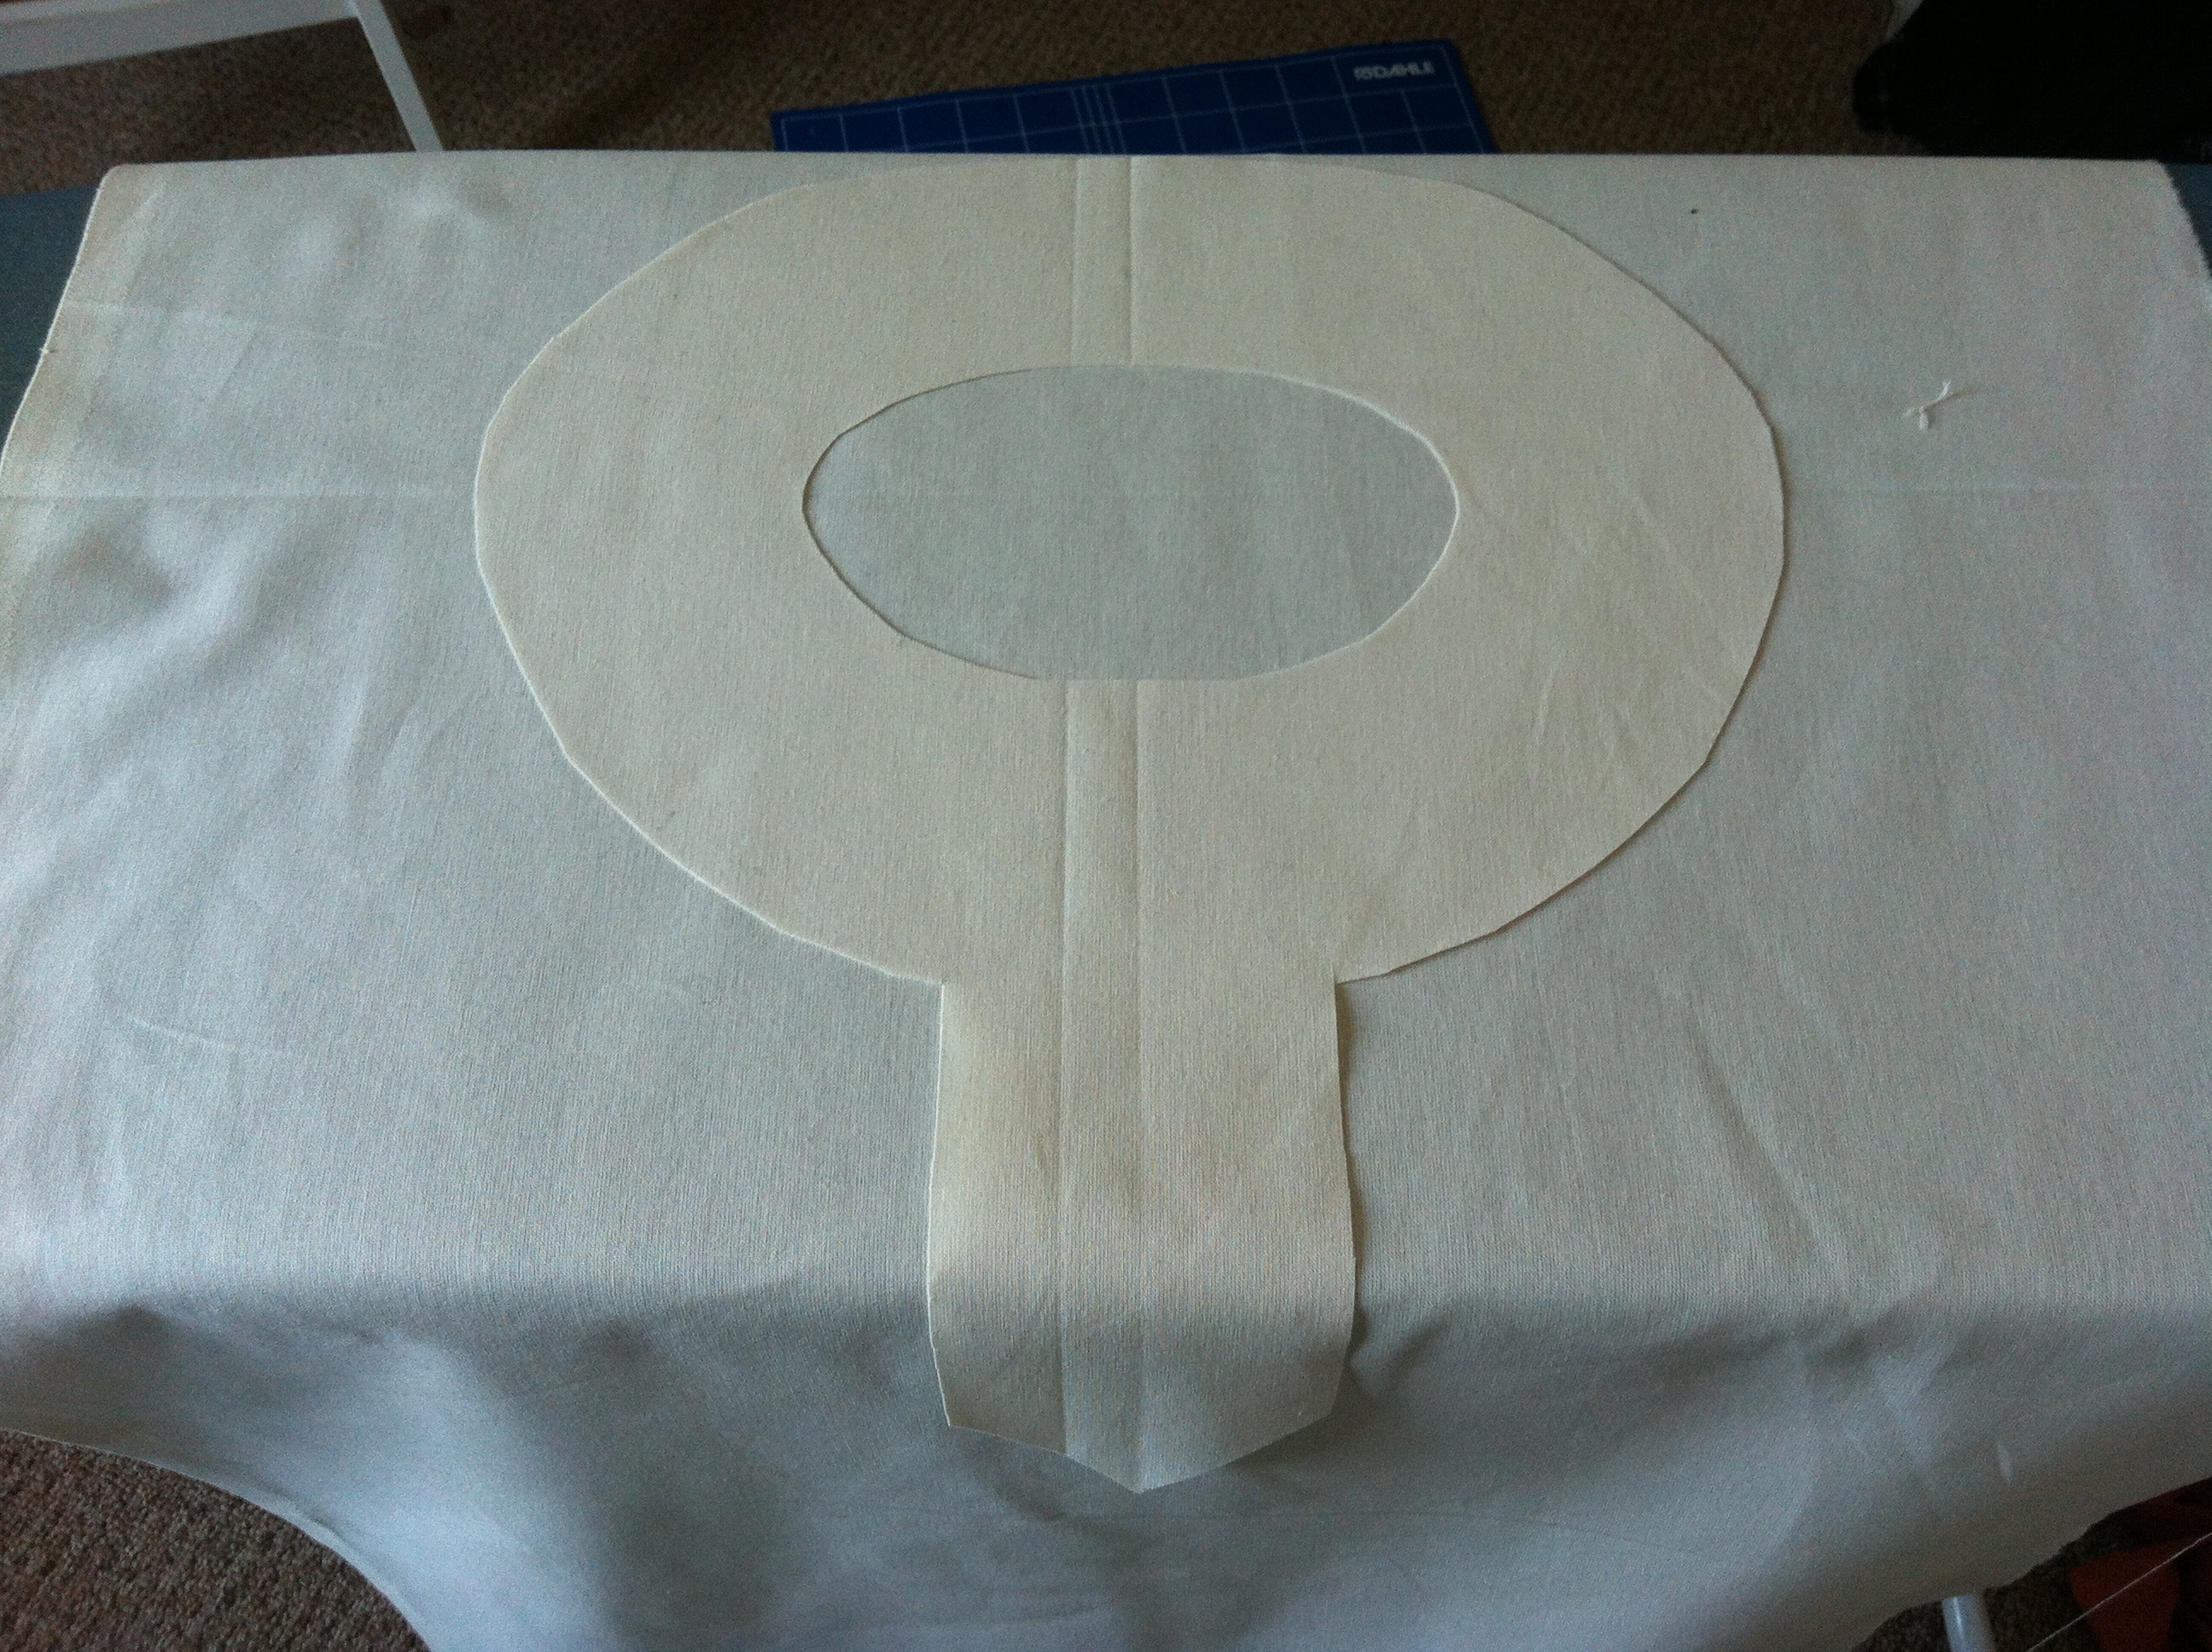
Here’s one I invented earlier for another tunic. It will come out as a head hole with a V-neck. In this example I’ve folded the fabric in half and cut it on the fold.

Here you can see it laid out on top of the body of the tunic that I’m making.
You want to put the RIGHT sides together. You will be working on the top of the fabric.
I finished the edges of the facing with a zig zag stitch to stop it fraying. I’ll also be carefully invisible stitching it and turning the edges under once I’ve finished the tunic and dyed it. The only reason I’m not doing it before I make the rest of it is because I don’t know what colour the dye will be yet, and I need to match the thread to the fabric colour afterwards to get an invisible finish.
Anyway, pin it round the inner edge of the neck opening.

You can see here I’ve also drawn the neck opening in with red pen. I suggest using chalk or disappearing fabric pen or something. Not permanent marker like I always do because I’m lazy.
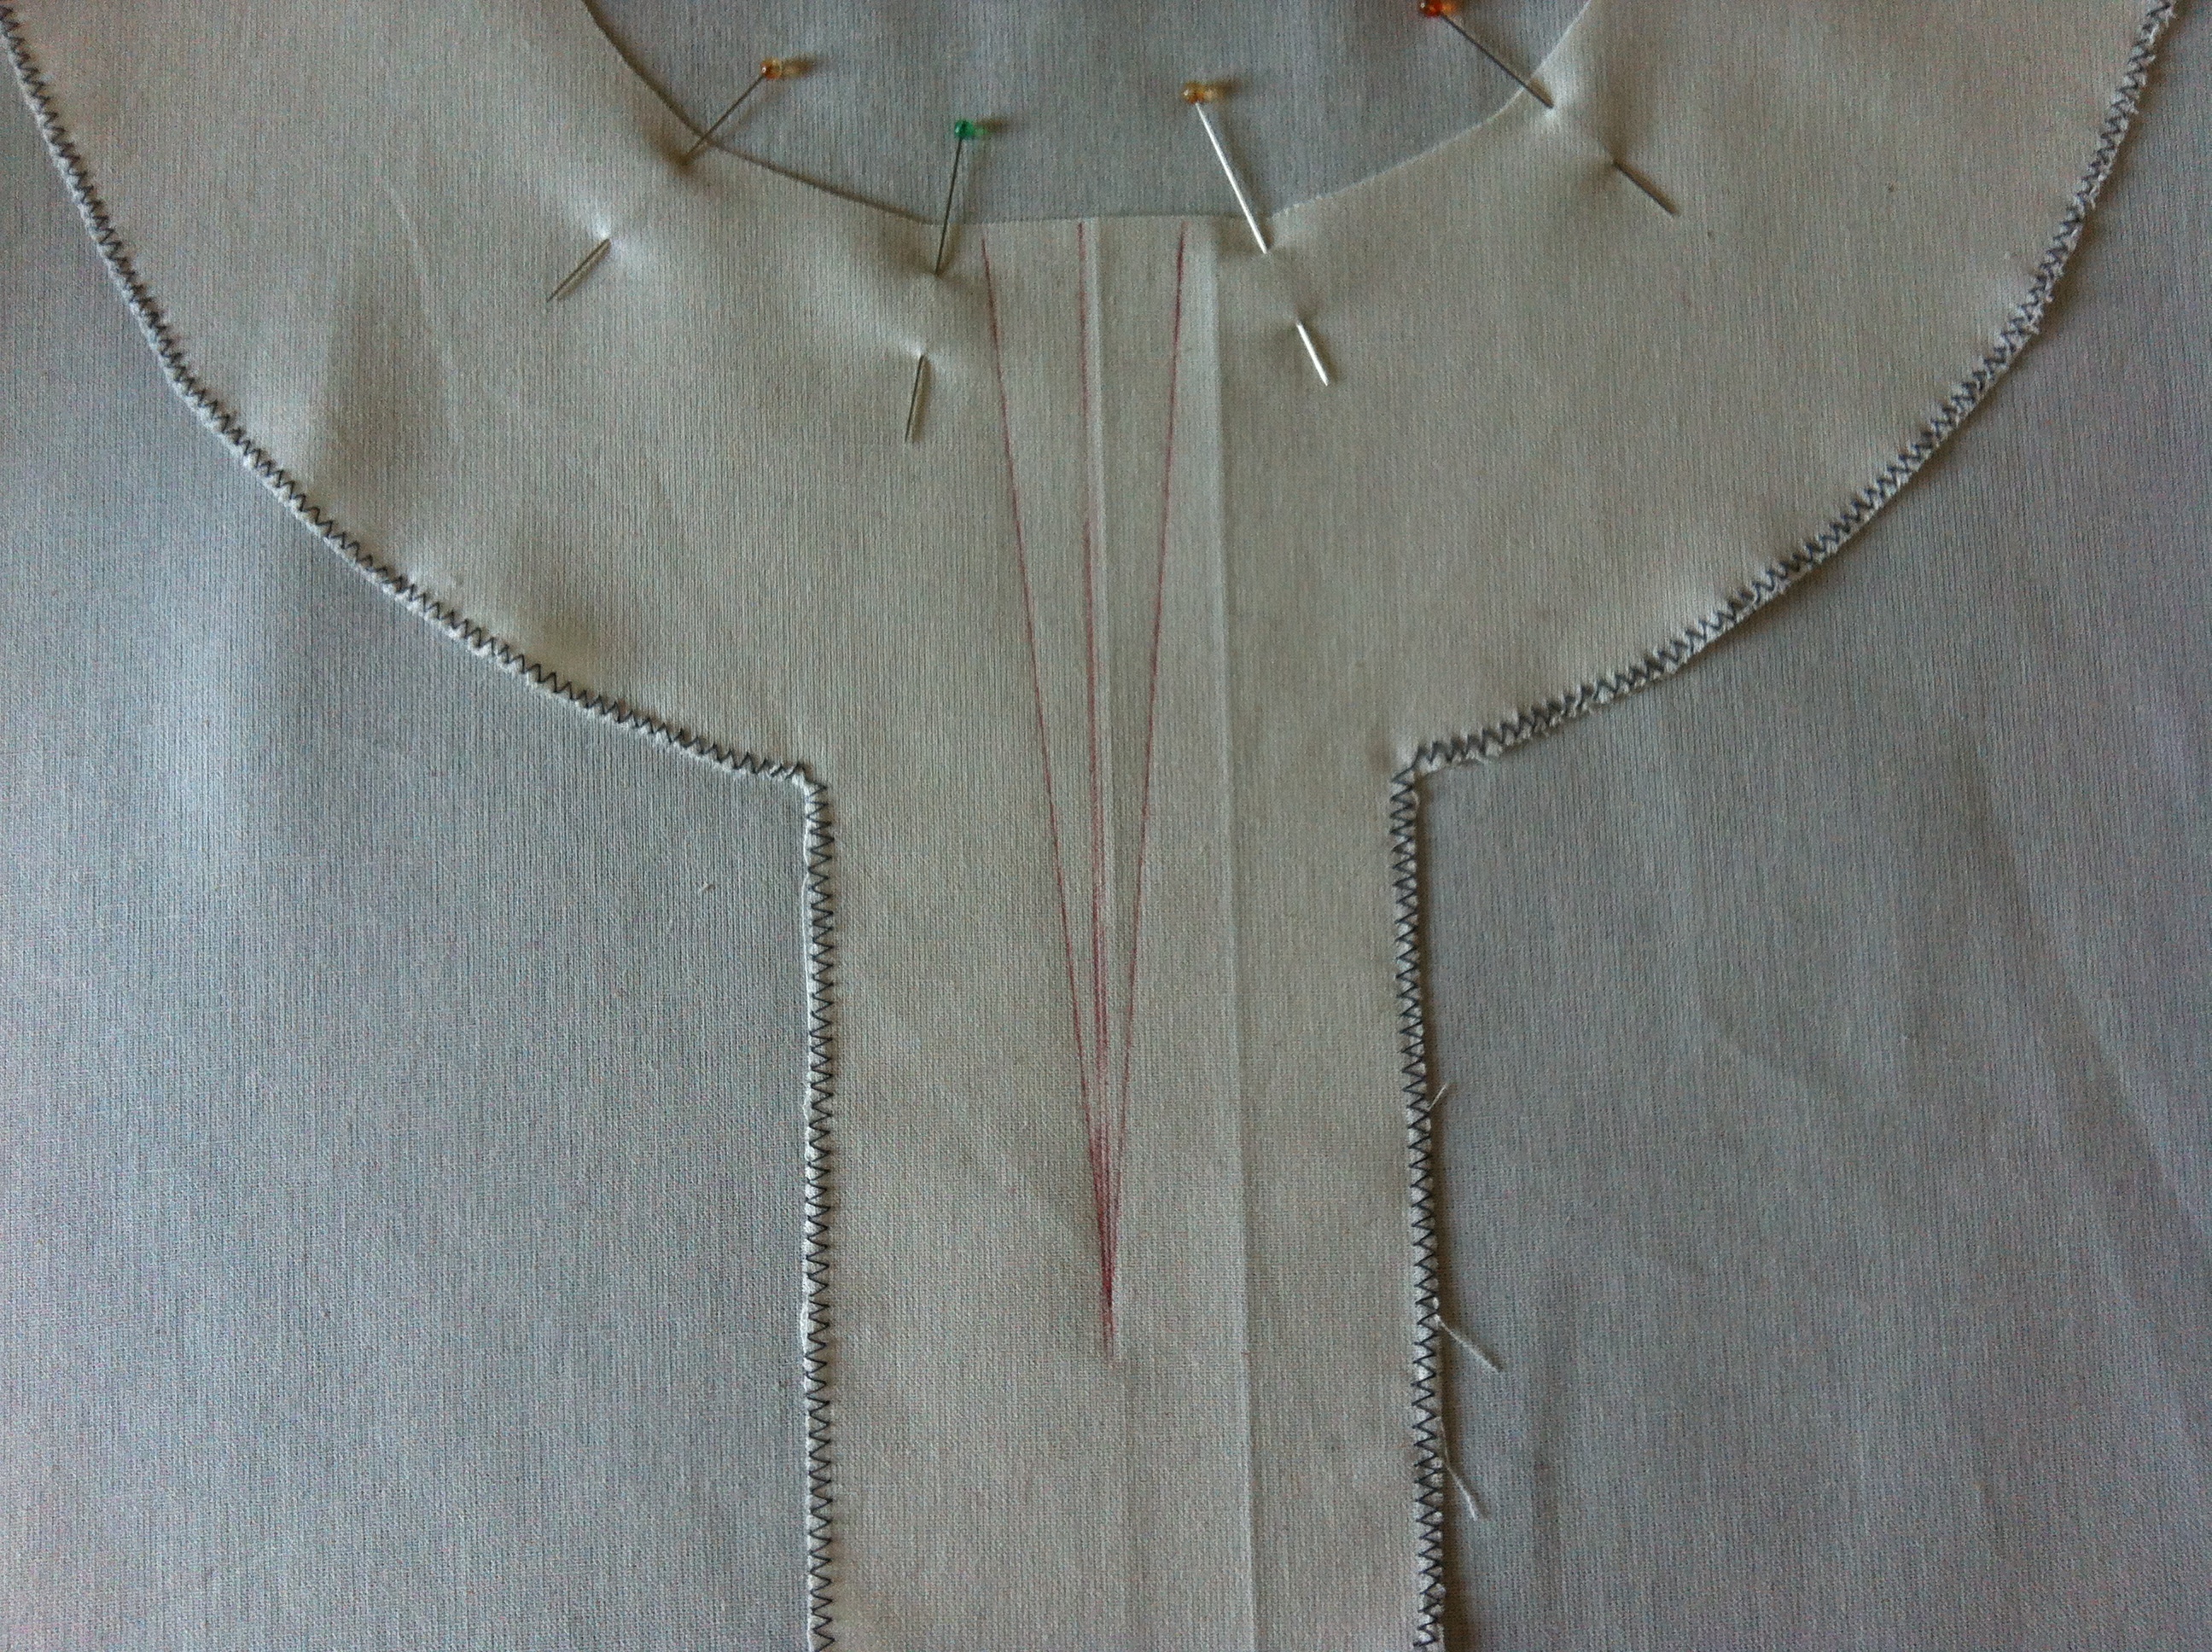
Sew around the inner neck edge AND the V-neck (or whatever shape you chose for the front). Keep it close to the edge and you won’t have to snip it when you turn it.

Cut the hole out of the middle – keeping inside the stitching. Trim any hard corners like sharp edge where it turns to a V-neck. Make sure you trim all the way to the bottom of the V-neck. Like, so close that you think you’re about to snip through your stitching there.
Give it a press with a steamy iron.
Then push the facing through to the other side of the garment. You can see here where it’s half turned.
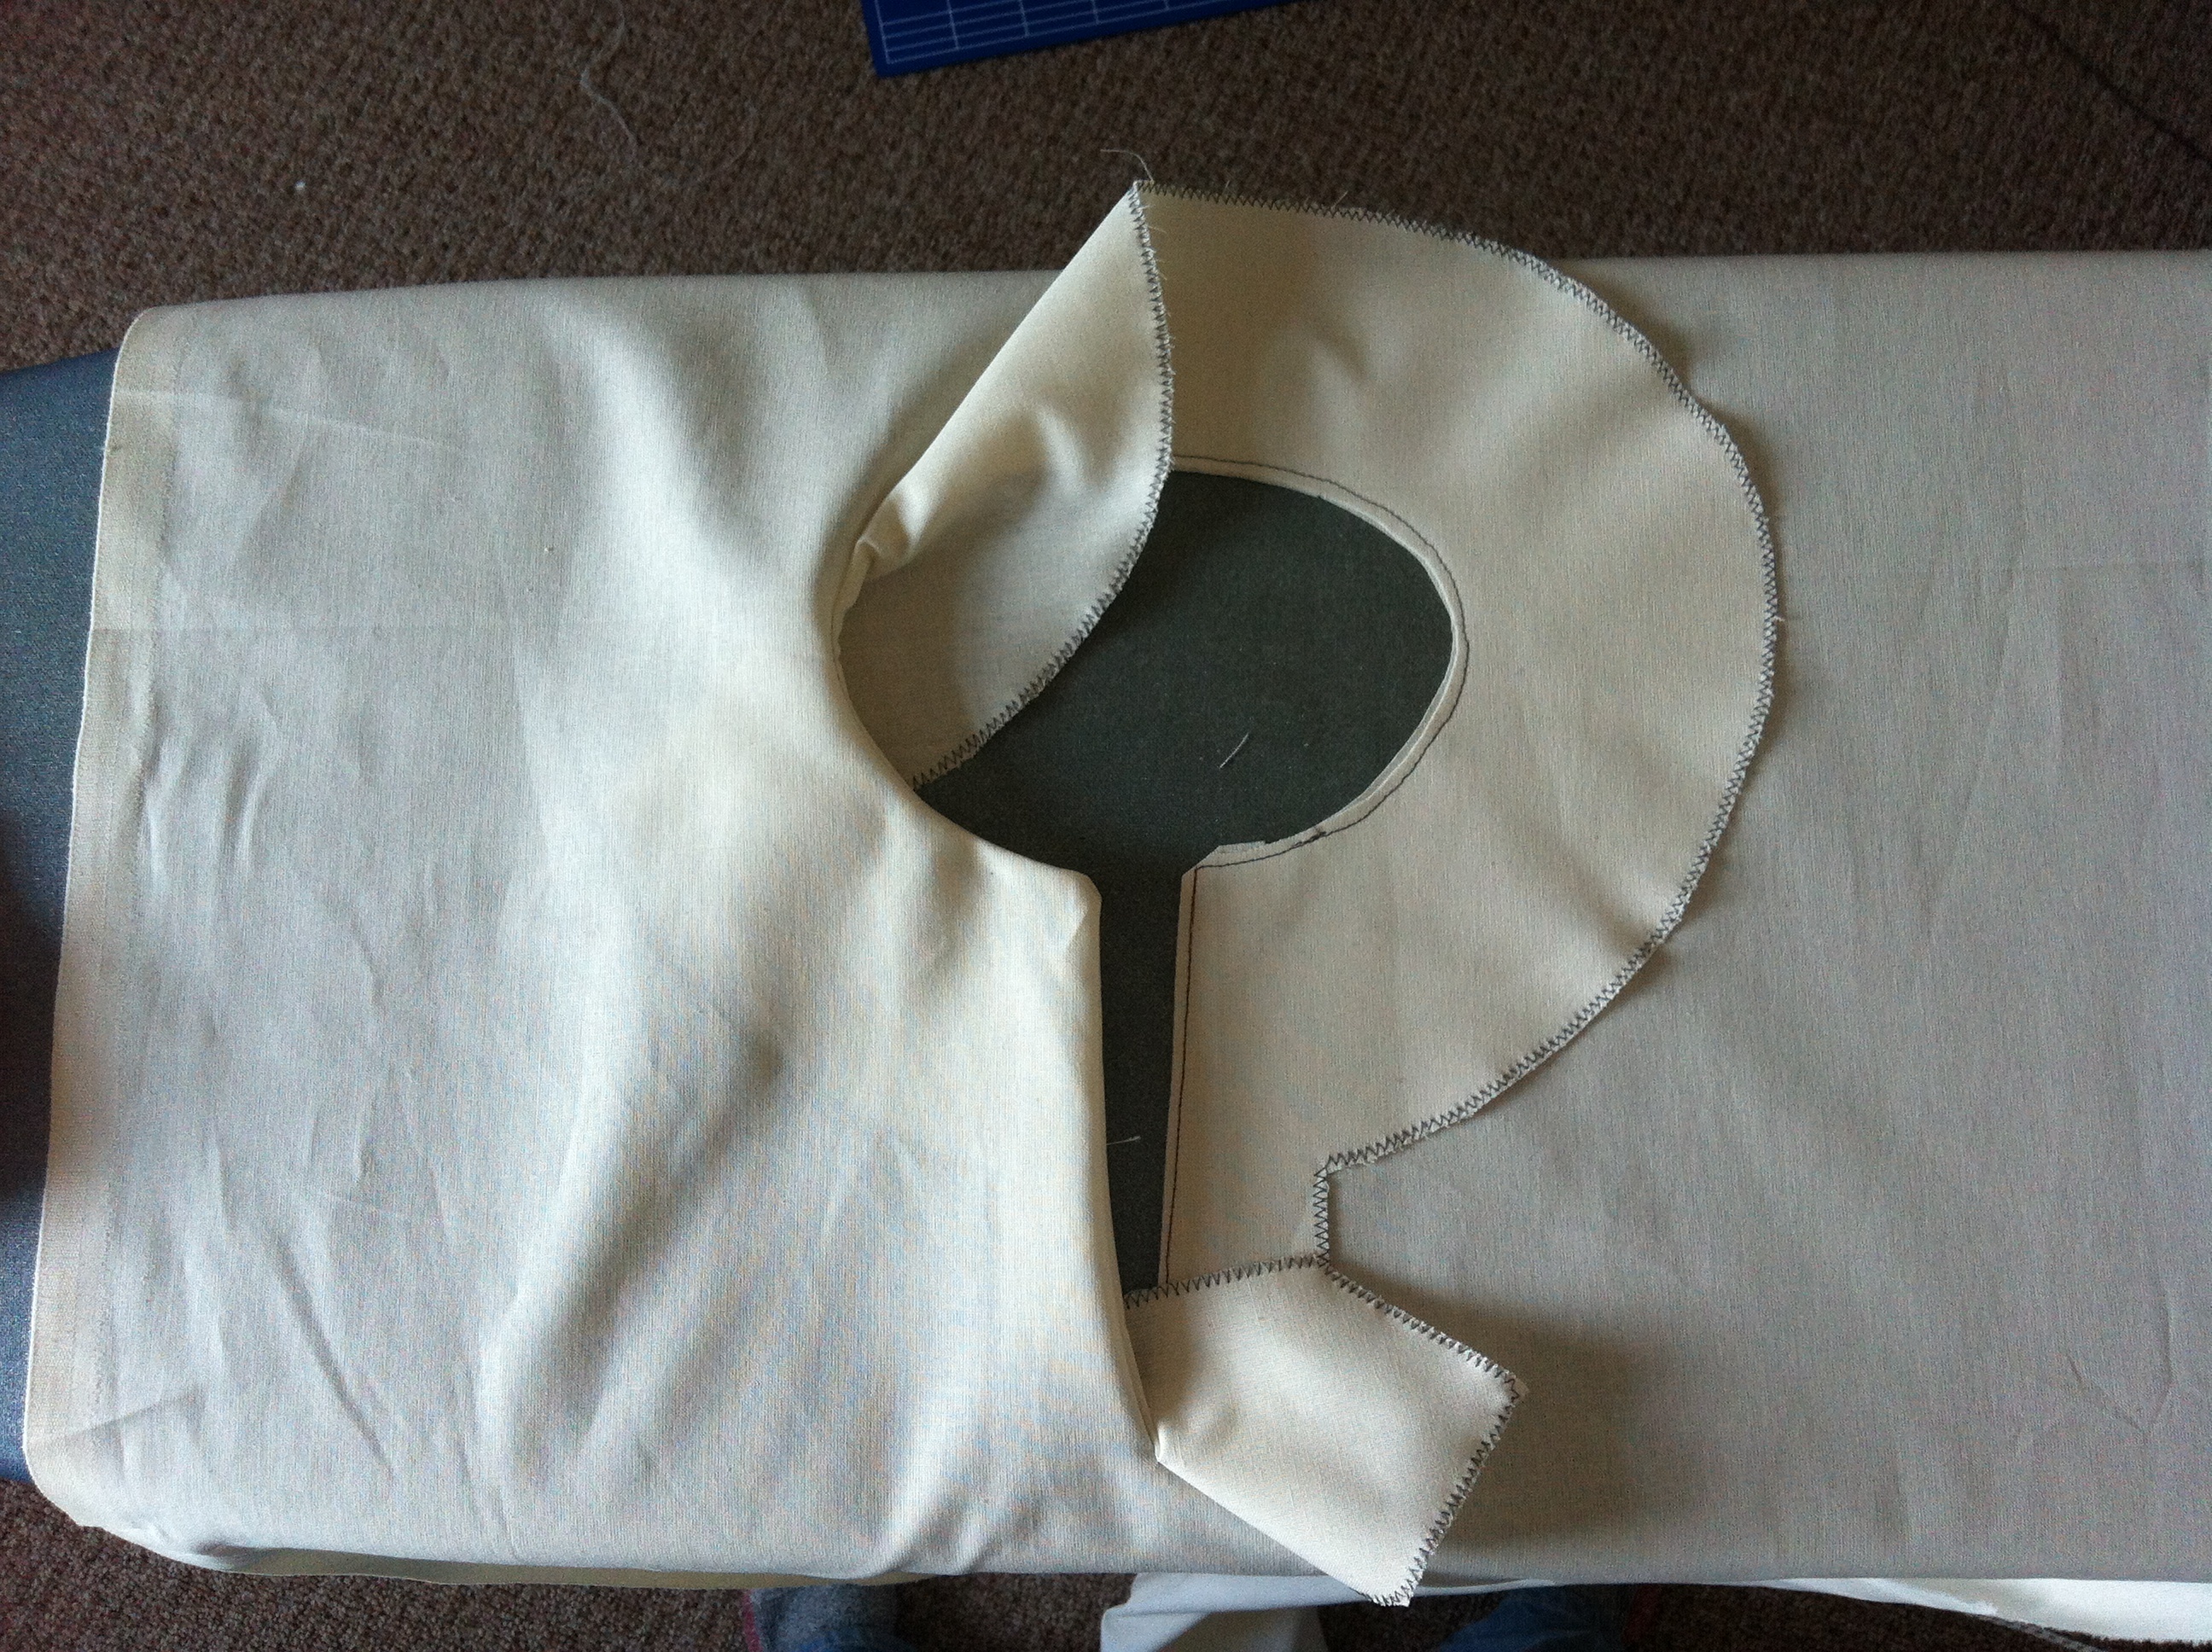
And there it is. One nice neat neck facing.
You can see how I didn’t cut far enough down the V-neck and it’s not turned properly. It’s ok, I steamed it out. More or less.

And this is the inside of the tunic. Like I said, eventually I’ll turn the raw edge under. The zig zag was just to stop it fraying when I dye it and put it through the washing machine.
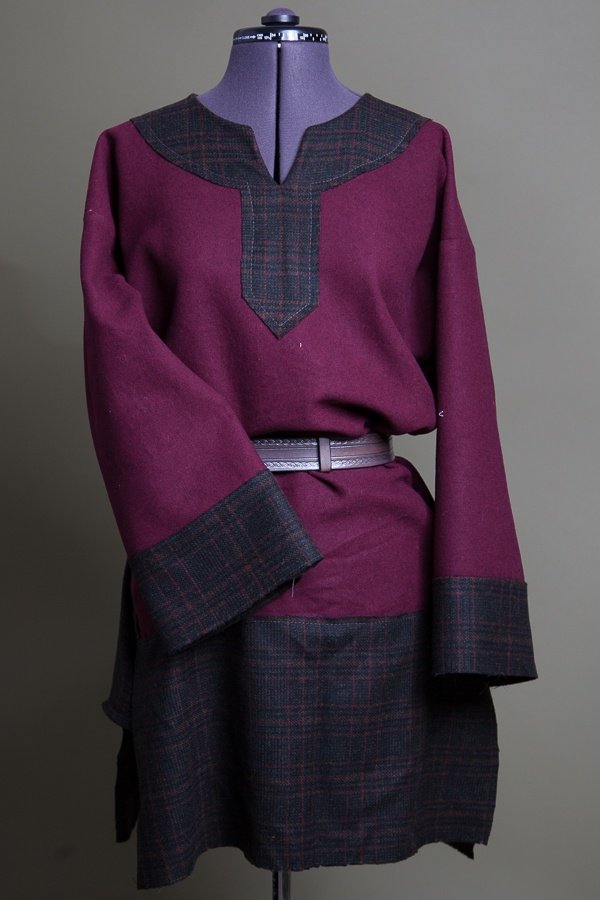
 Of course, if you start with your main body fabric wrong side up, then you can make a Viking style tunic using the same method: